Village Fairways books Villages tee times, lists your reservations, and shows golf cart directions to every course. This guide explains each part of the app.
Sign in
Village Fairways books tee times on the Villages golf system for you, so you sign in with the same information you use there. Village Fairways doesn't have a separate password.
What you need to sign in
- TVN Username and TVN Password: The username and password you use to sign in to thevillages.net, The Villages resident website. TVN is short for thevillages.net.
- Golf PIN: The PIN that the Villages golf system asks for after you select GOLF on thevillages.net. It's separate from your TVN password.
If you don't know your username, password, or golf PIN, check with The Villages. Village Fairways can't look them up or reset them. Village Fairways stores them encrypted and uses them only to work with the Villages golf system for you.
To see what you're typing, select Show passwords. The sign-in screen also has a short version of this explanation under What are these?
Register and sign in
To register the first time, follow these steps:
- Select First time? Register here.
- Enter your TVN username.
- Enter your TVN password.
- Enter your golf PIN.
- Enter your email address if you want confirmations by email. This step is optional.
- Select Connect.
On later visits, follow these steps:
- Enter your TVN username.
- Enter your TVN password.
- Enter your golf PIN.
- Select Log In.
Your device stays signed in for about a month. To sign out sooner, select Log out of this device in Account.
Book a tee time
To book a tee time, follow these steps:
- Select Book Tee Time at the bottom of the screen.
- Select a play date.
- Select the golfers in your group. To fill in a group you saved earlier, select it from Saved group.
- Select Executive or Championship.
- Select an area, or leave Any area selected.
- Turn on Any guests? if anyone in your group doesn't live in The Villages.
- Select a time preference, such as Early Bird or Any Time. To set your own window instead, select Choose an exact time range, then enter the start and end times.
- Select Find Available Tee Times.
- Select a time from the results.
- Review the details in Confirm Booking.
- Select Book It!
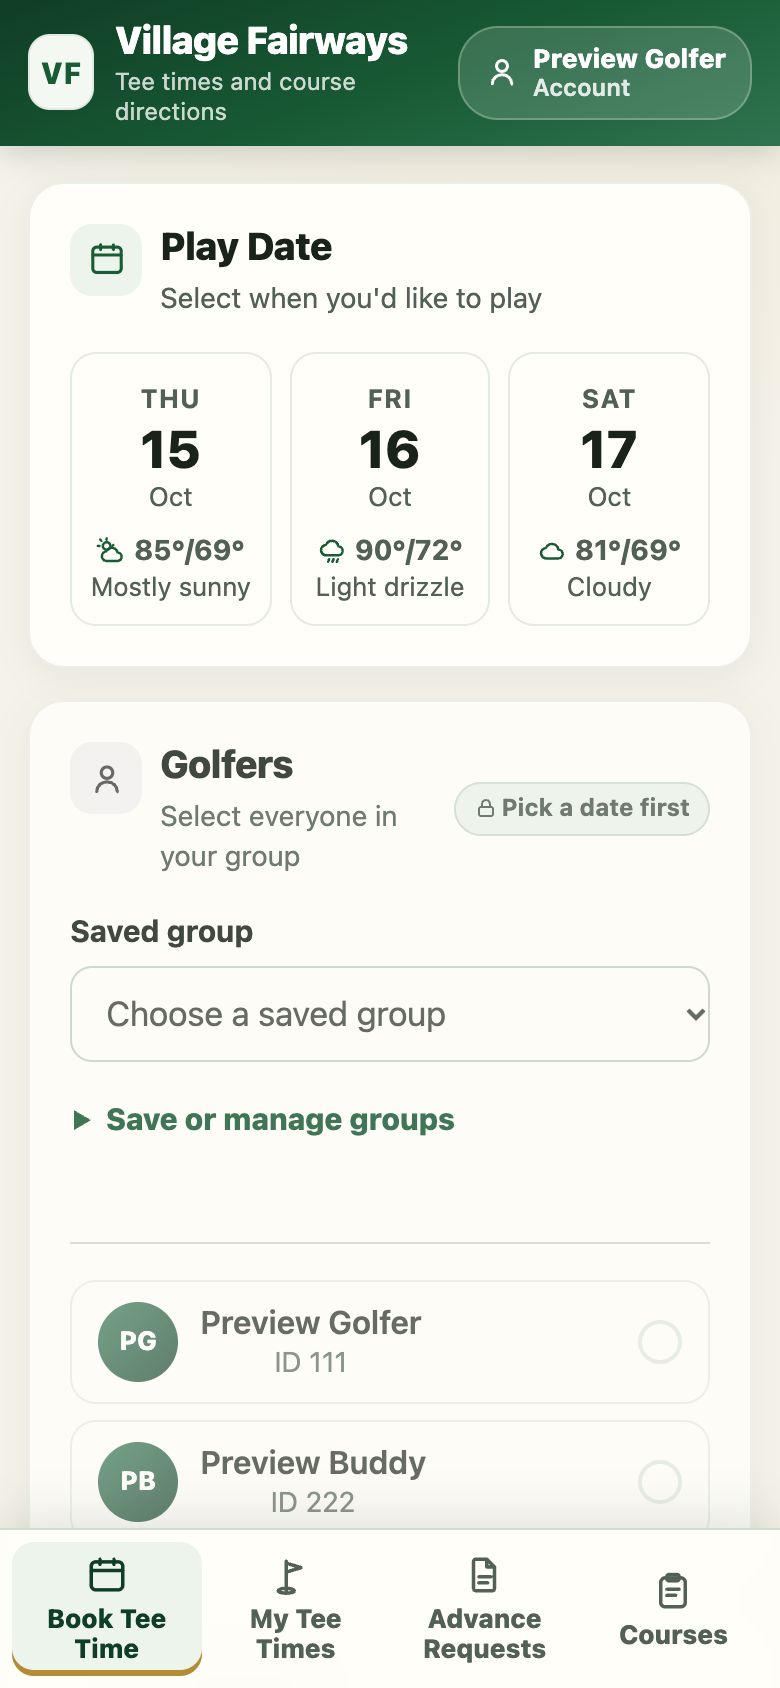
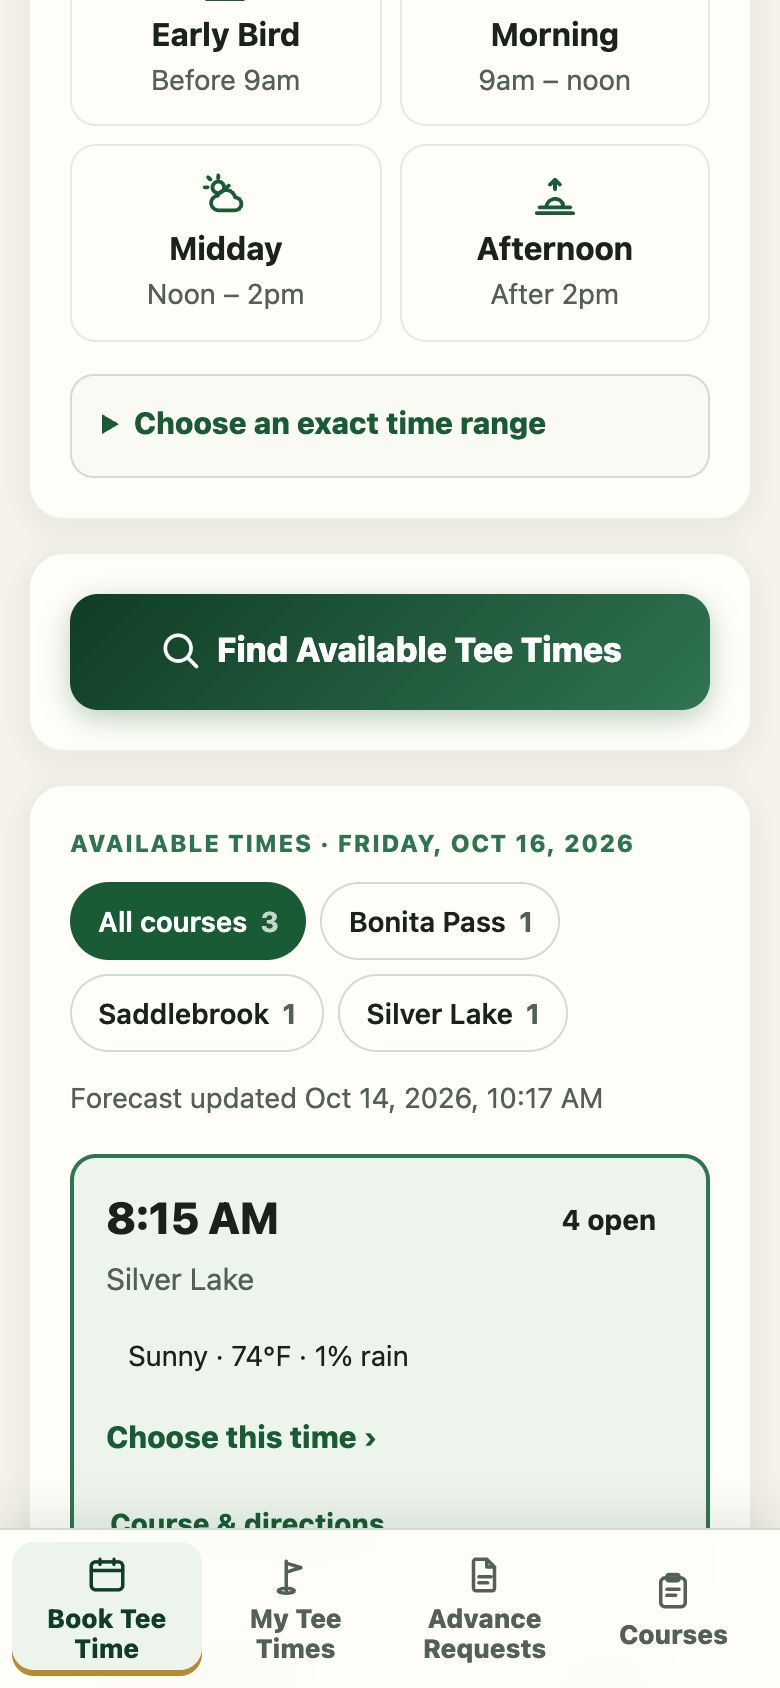
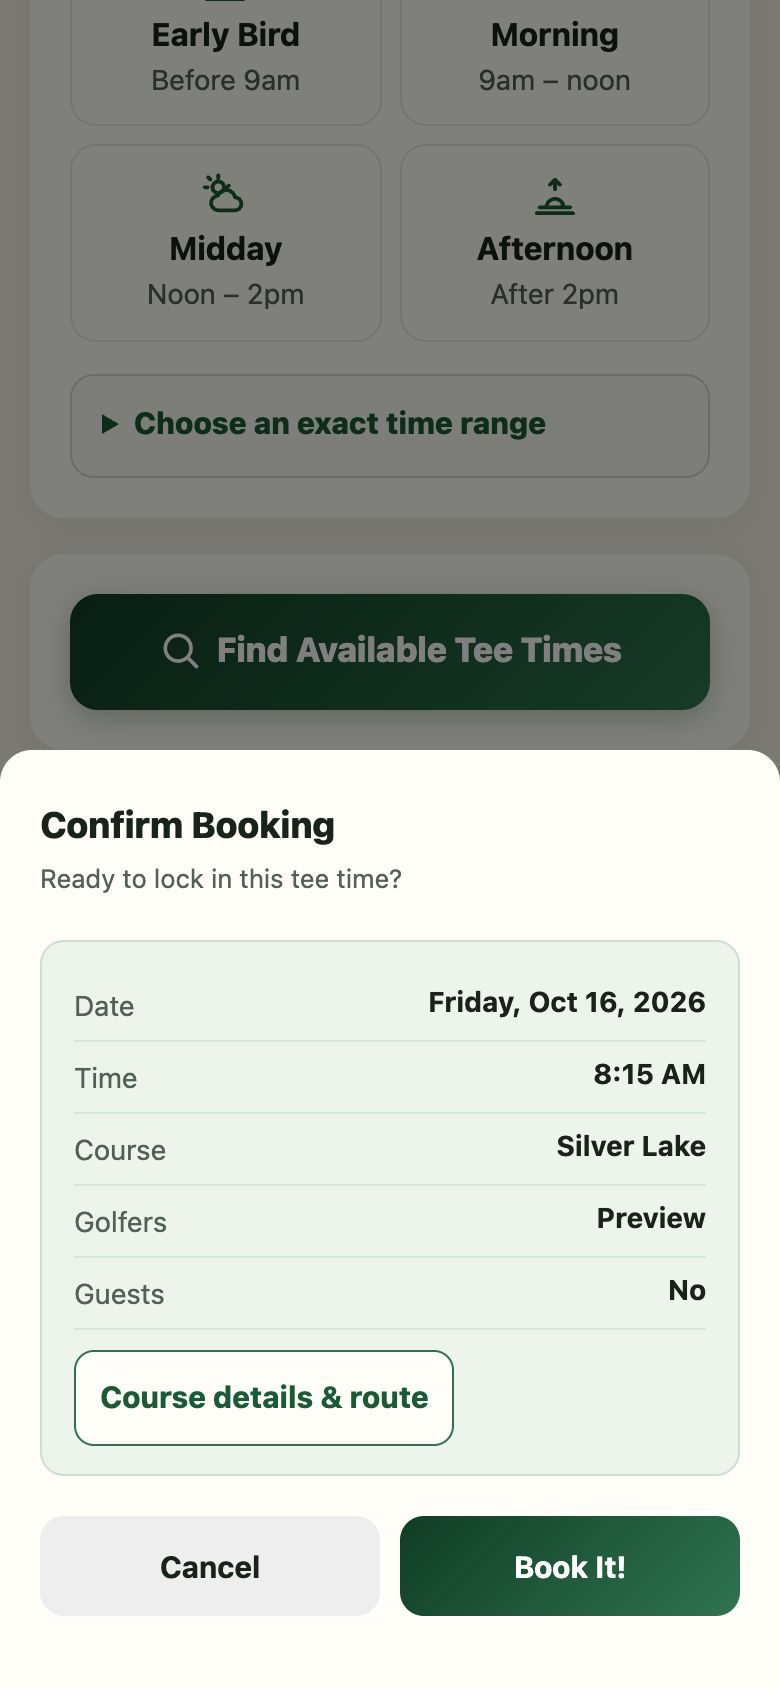
After the booking succeeds, the confirmation shows these buttons:
- Add to calendar downloads a calendar file. Open it to add the tee time to your calendar.
- Cart directions shows a golf cart route to the course.
If the app says it couldn't confirm the booking, open My Tee Times and select Refresh My Tee Times before you try again. The booking might have gone through.
The message from the Villages site appears at the top of My Tee Times. Read it to see what the Villages site reported.
Save a group
A saved group keeps your golfers, the course type, and any exact time range, so you can fill them in with one selection. To save a group, follow these steps:
- On Book Tee Time, select the golfers and the course type.
- Under Saved group, select Save or manage groups.
- Enter a name for the group, such as Tuesday foursome.
- Select Save current choices.
Next time, select the group from Saved group. To remove a group, select it from Saved group, open Save or manage groups, and then select Delete selected group.
My tee times
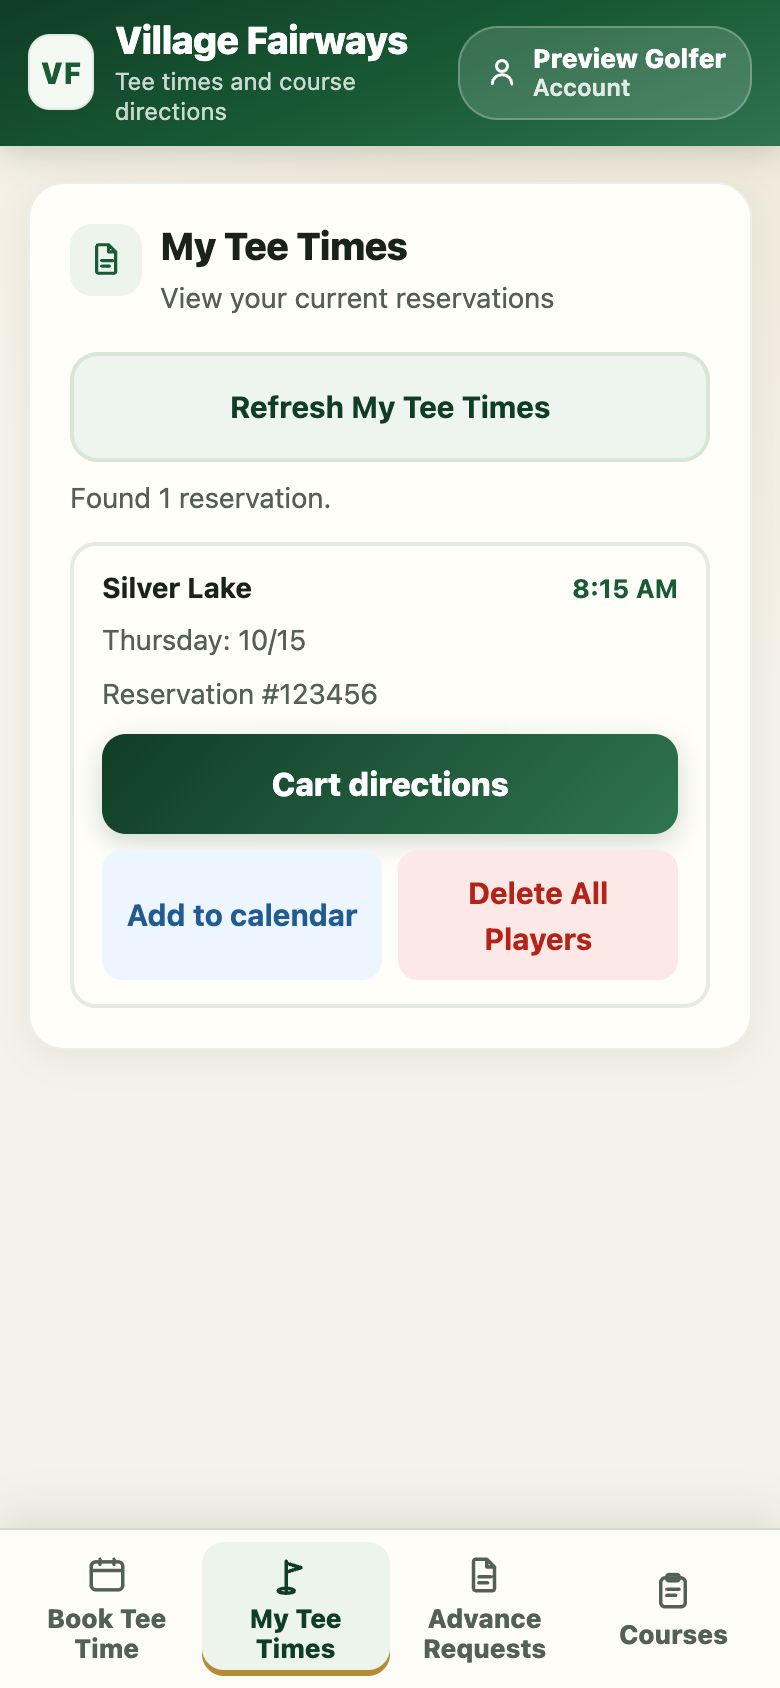
Select My Tee Times to see your reservations. These buttons help you manage them:
- Refresh My Tee Times loads your reservations from the Villages site again.
- Cart directions shows a golf cart route to the course.
- Add to calendar downloads a calendar file. Open it to add the tee time to your calendar.
- Delete All Players removes everyone from the reservation.
The app asks you to confirm before it deletes anything. Select Delete All Players to confirm, or select Keep Reservation to cancel.
Advance requests
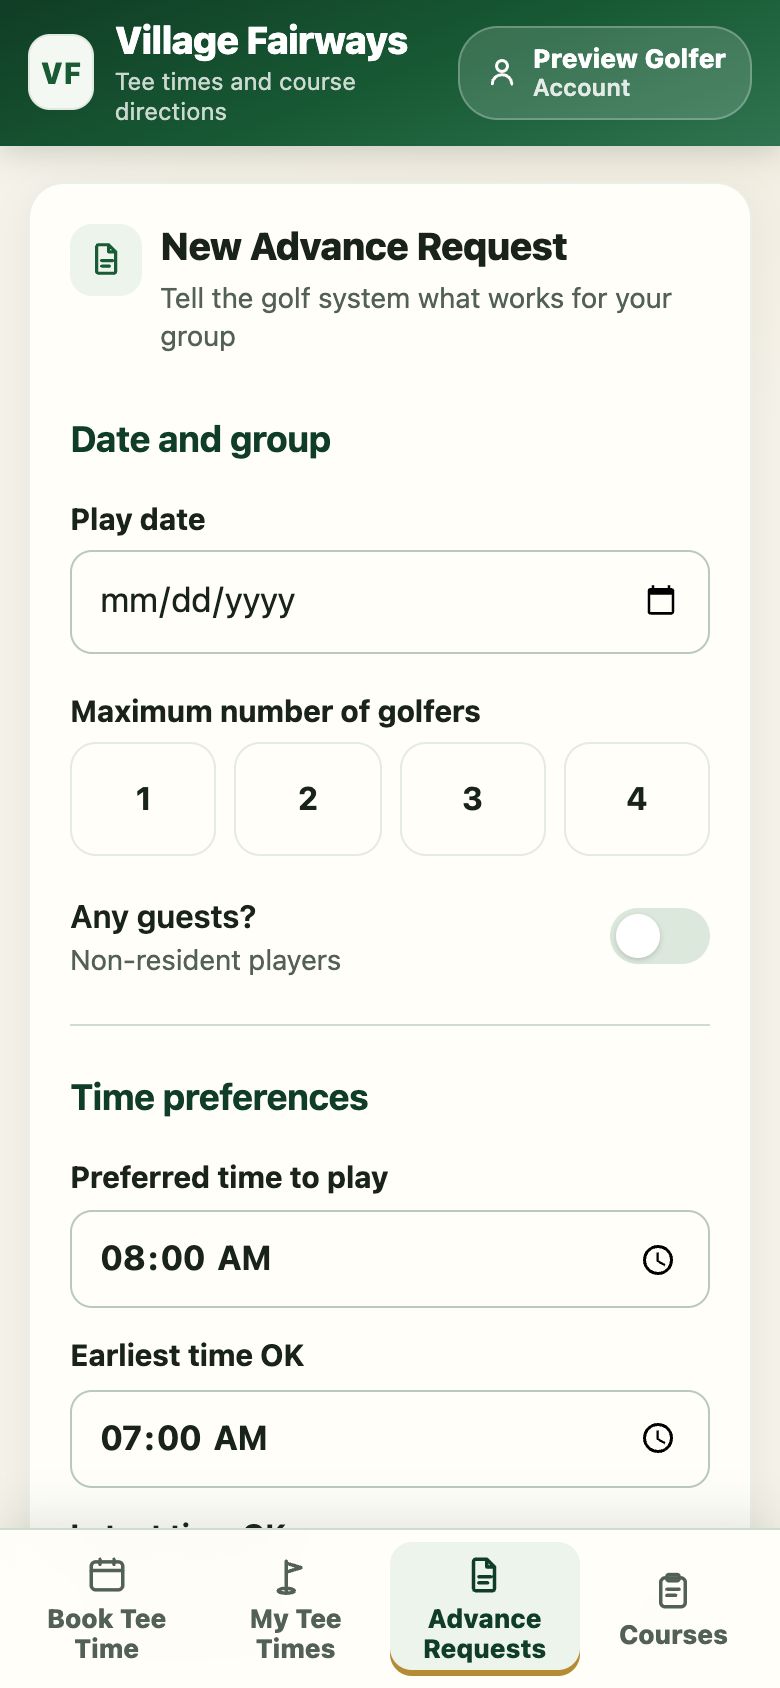
An advance request tells the golf system your preferences for a future date. The golf system assigns tee times later, so a request isn't a confirmed tee time.
To submit an advance request, follow these steps:
- Select Advance Requests at the bottom of the screen.
- Select the play date.
- Select the maximum number of golfers.
- Turn on Any guests? if anyone in your group doesn't live in The Villages.
- Set Preferred time to play.
- Set Earliest time OK.
- Set Latest time OK.
- Under What matters most?, select Course choices or Tee time.
- Select Executive or Championship as the course type.
- Select Load courses for this date and type.
- Select courses in the order you prefer them. If you submitted a request before, you can select Use my usual picks to reuse the courses from your last request.
- Select Done: choose golfers.
- Select the golfers for the request.
- Select Review Advance Request.
- Check the summary.
- Select Submit request.
You receive the result by email when you save an email address in Account. To see requests that are still waiting, select Refresh My Requests under My Open Advance Requests. To withdraw a request, select Cancel Request.
Courses and cart directions
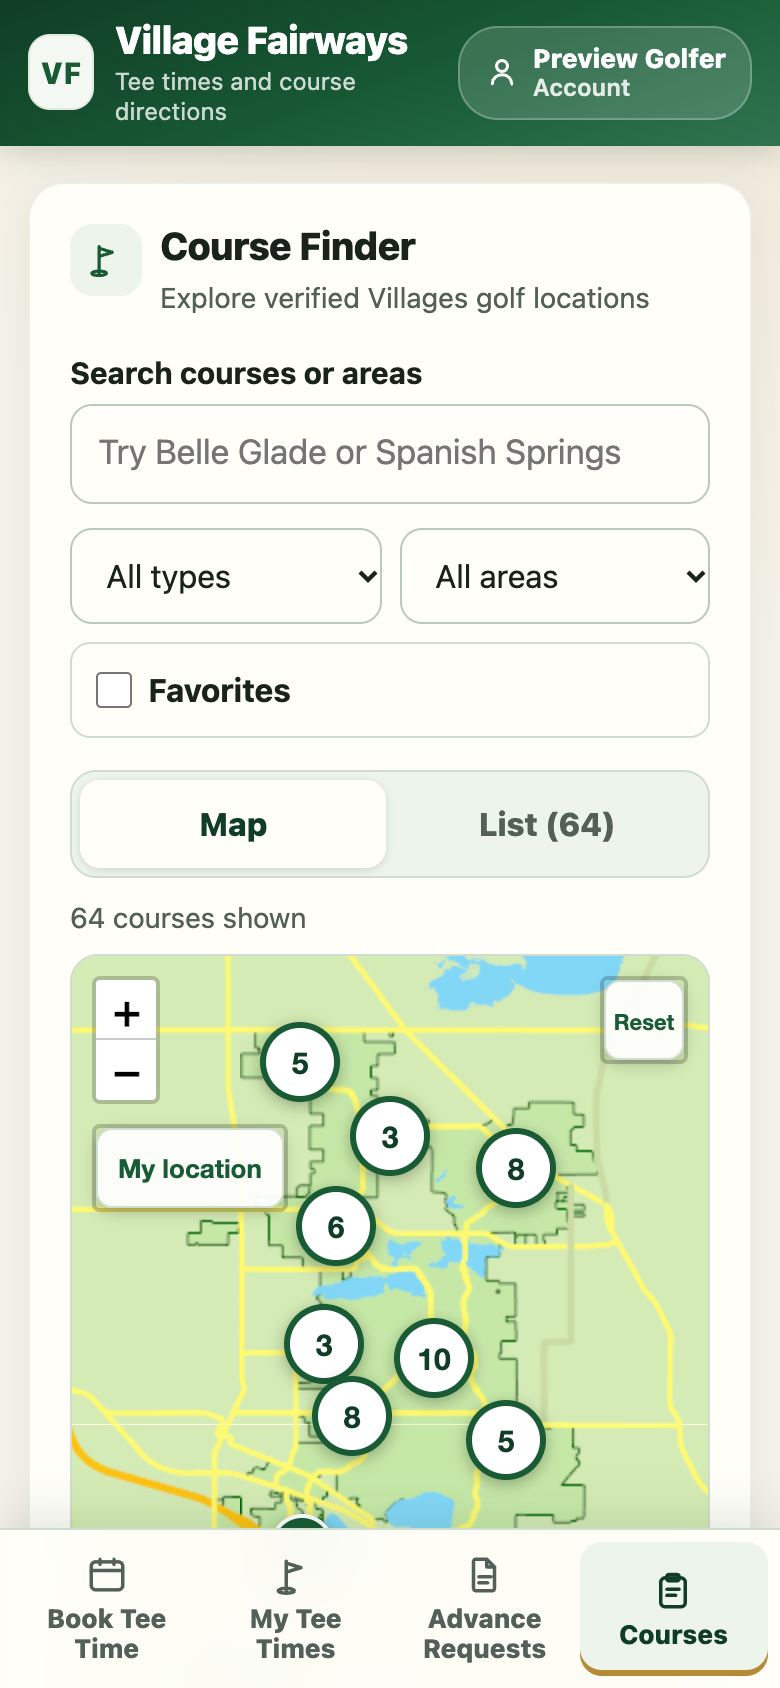
Select Courses to explore every course on a map or in a list. These controls help you find a course:
- Map and List switch between the two views.
- The search box and filters narrow the courses by name, type, and area.
- The star on a course adds it to your favorites. Select Favorites to show only your favorites.
- My location shows where you are on the map. The app asks for your location only when you select a location button.
Select a pin or a course to see its details. In the details, select Cart directions to get a golf cart route. Next to each tee time in your search results, Course & directions opens the same details.
To get cart directions, follow these steps:
- Select Cart directions on a course, a reservation in My Tee Times, or a booking confirmation.
- Select a starting point:
- Use current location starts from where you are.
- Choose on map lets you select your starting point on the map. Then select Confirm starting point.
- Use saved starting point starts from the point you saved earlier. It appears after you save a starting point.
- Review the route on the map. To see each turn, select Show directions.
To reuse a starting point, turn on Save this as my starting point before you select Use current location, or turn on Save as my starting point on the map. The directions are written: the app doesn't speak the turns or follow your position as you drive.
Account
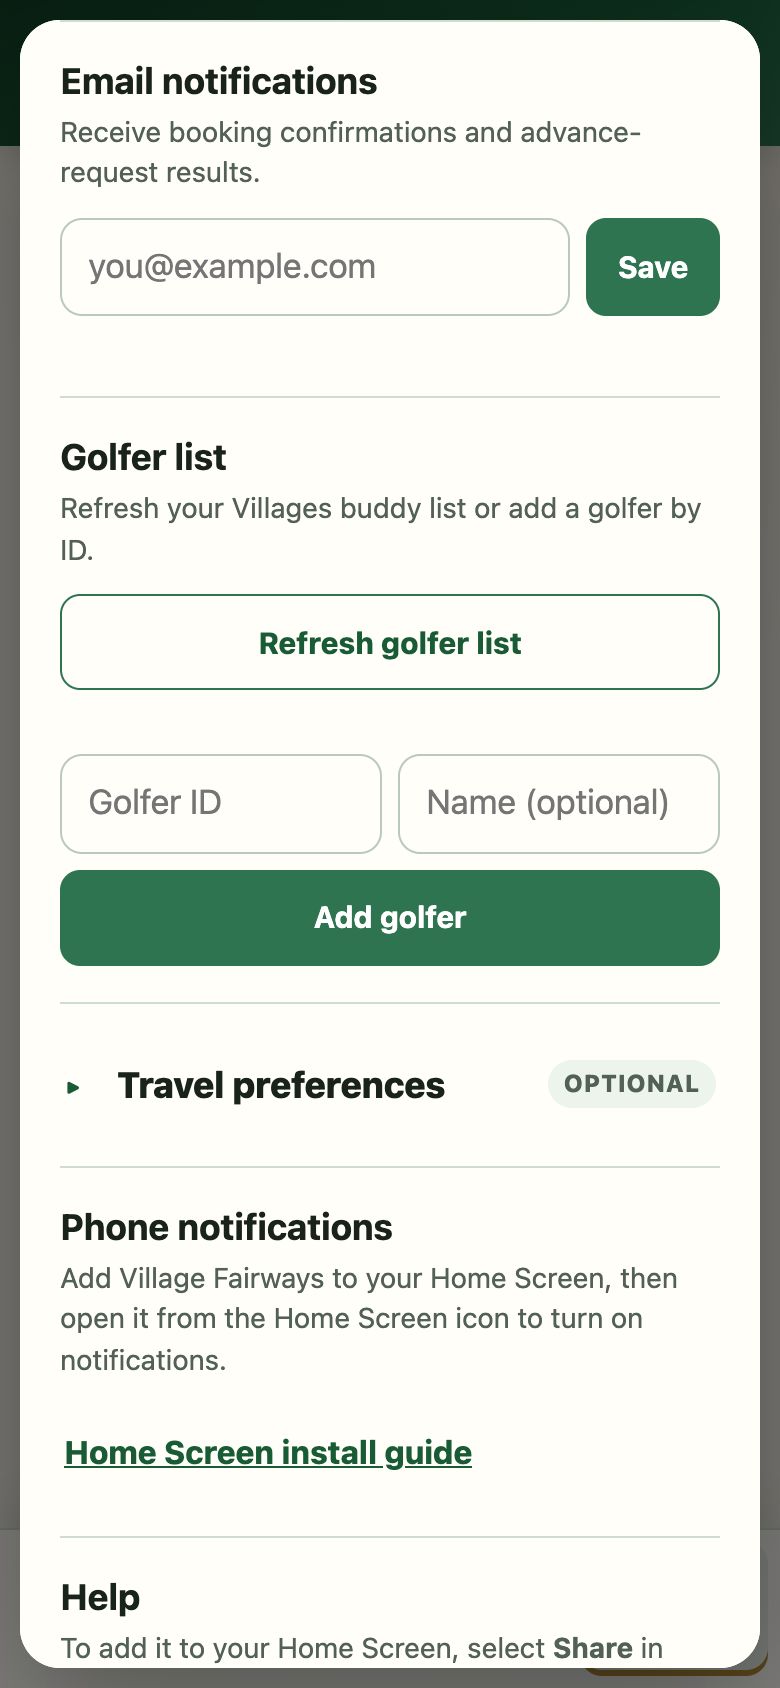
Select your name at the top of the screen to open Account. It has these sections:
- Email notifications stores the email address for booking confirmations and advance-request results. Select Save after you enter it.
- Refresh golfer list loads your golfers from the Villages site again. To add one golfer by ID, enter the ID and select Add golfer.
- Travel preferences is optional. It stores a starting location for cart directions.
- Phone notifications turns on a notification when you book and a reminder before your tee time.
- Help links to the install guide and this user guide.
- Log out of this device signs you out on this device only.
Phone notifications
When you turn on notifications, your phone shows these messages:
- A notification when a tee time is booked in Village Fairways.
- A reminder about 12 hours before the tee time. When 12 hours before lands overnight, the reminder arrives at 8 PM the evening before instead.
Reminders cover only tee times that you book in Village Fairways, not tee times booked somewhere else. Everyone in the booking group who has a Village Fairways account and has notifications turned on gets the messages.
On an iPhone, add Village Fairways to your Home Screen and open it from the Home Screen icon before you turn on notifications. The Home Screen install guide shows how.
To turn on notifications, follow these steps:
- Select your name at the top of the screen to open Account.
- In Phone notifications, select Turn on notifications.
- When your phone asks, select Allow.
To check that notifications work, select Send a test notification. To stop them, select Turn off notifications. When you sign out of a device, that device stops receiving notifications for your account.
If something goes wrong
Use these answers for common problems:
- The Villages site is slow: Wait a few minutes, then try again.
- Sign-in fails: Use the same username, password, and PIN that you use on thevillages.net. Read What you need to sign in.
- A booking or delete result is unclear: Open My Tee Times and select Refresh My Tee Times before you try again.
- You want the app on your Home Screen: Read the Home Screen install guide.